| Vorheriges Thema anzeigen :: Nächstes Thema anzeigen |
| Autor |
Nachricht |
Hafrod
Anmeldungsdatum: 28.09.2013
Beiträge: 34
Status: Offline
|
 Verfasst am: So Sep 29, 2013 1:02 am Titel: My 1983 GPZ305 project Verfasst am: So Sep 29, 2013 1:02 am Titel: My 1983 GPZ305 project |
 |
|
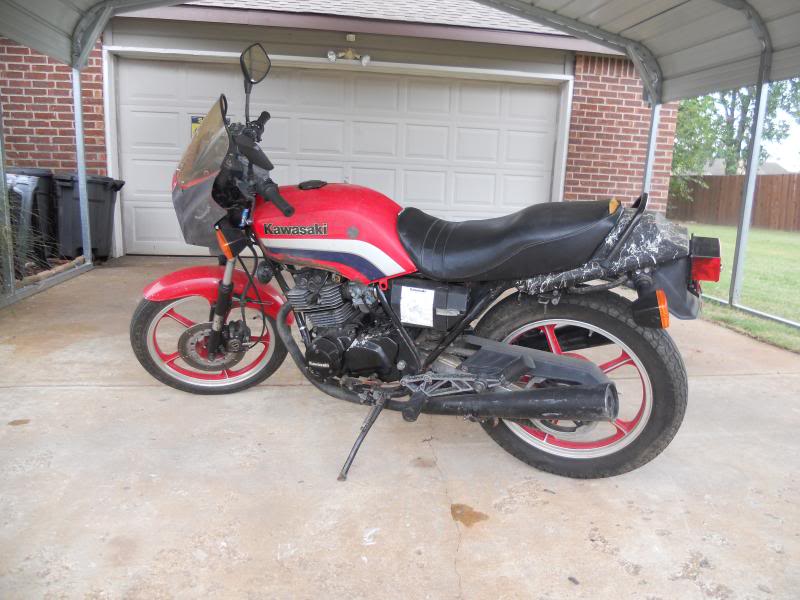
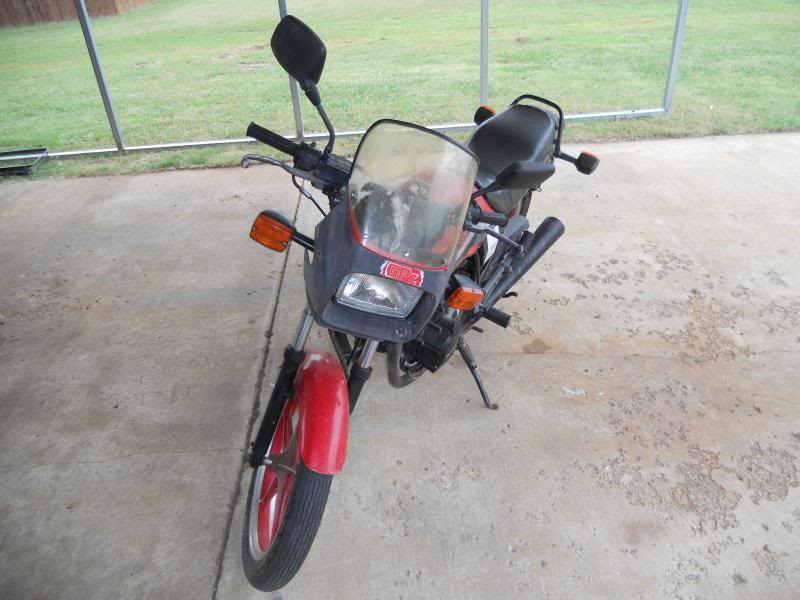
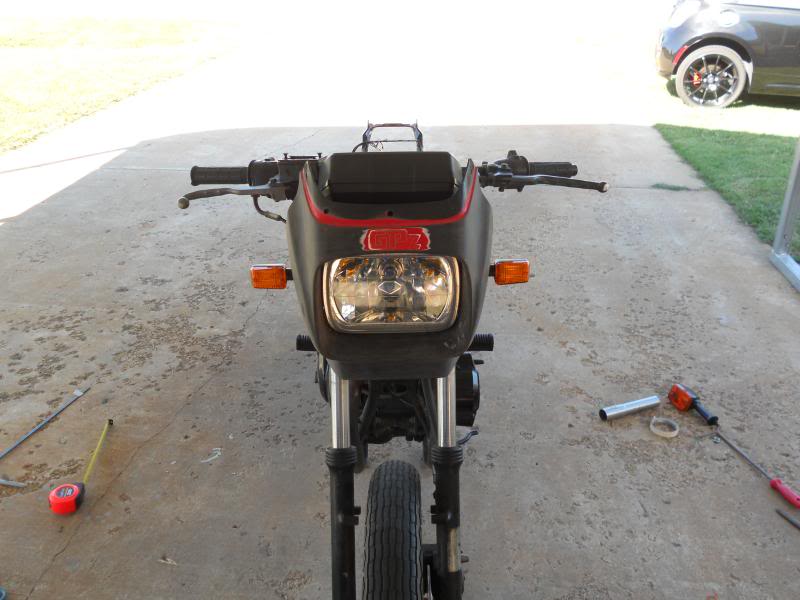
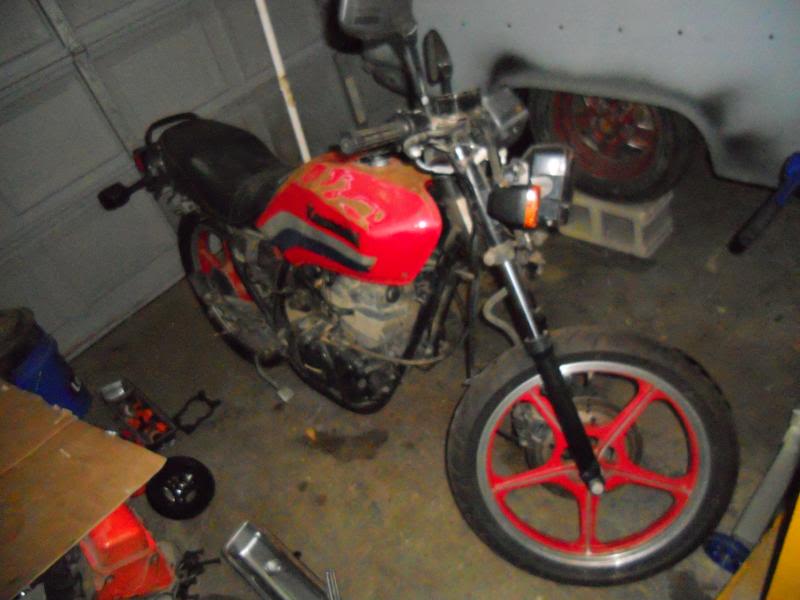
I just got it about 2 weeks ago. The previous owner said it has been sitting outside but only has 8000 miles on it. I'm planning on a full restoration. I want it to look like it is brand new again so it will be my winter project. I will keep updating this post as a build thread. I build classic and antique cars so it will be done with lots of detail and respect. My father bought me the exact bike when I was 15. Now I'm 41 and wanting a time machine. I had a want ad on the internet for about a month when this guy called me. Here's some before pictures.
  |
|
| Nach oben |
|
 |
Hafrod
Anmeldungsdatum: 28.09.2013
Beiträge: 34
Status: Offline
|
| Verfasst am: So Sep 29, 2013 1:09 am Titel: |
|
|
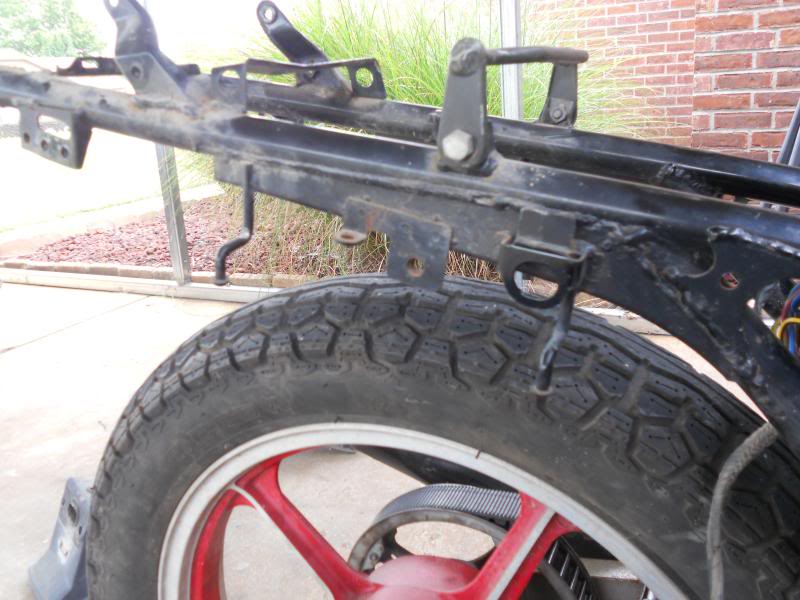
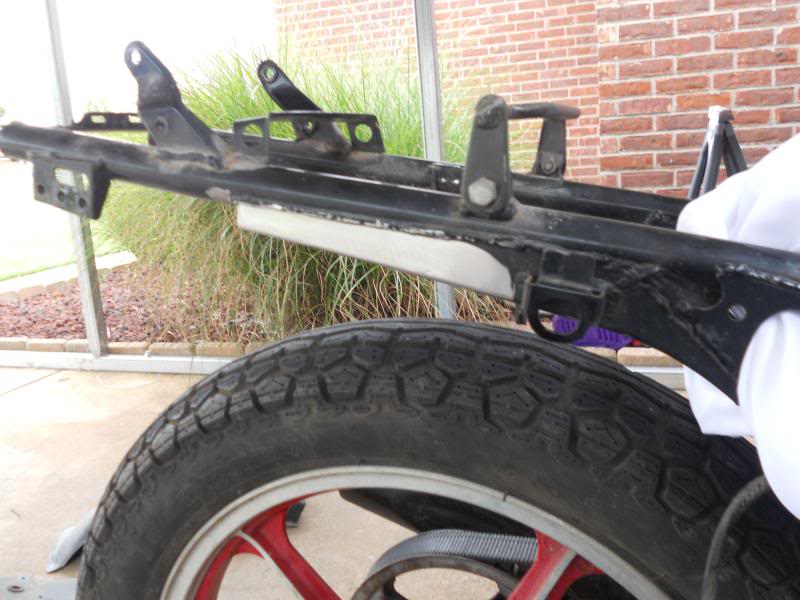
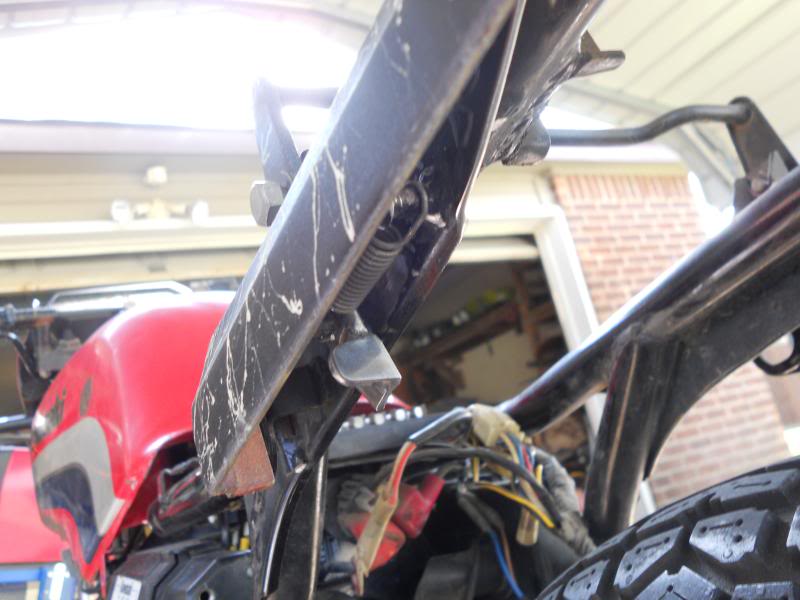
| I'm having a tough time deciding if I want to lightly customize it. I would like to lower it about two inches front and back and may put on some smaller stock looking blinkers. I would also like to relocate the horns by hiding them in the front fairing or under gas tank. I could cut off the mounts on the frame and smooth the tubes. That would clean up that area alot. I also do not like the bungy cord tabs that are welded on the rear frame rails. I'm afraid if I customize it too much, it will not be the time machine I am looking for. What do you guys think? |
|
| Nach oben |
|
|
Hafrod
Anmeldungsdatum: 28.09.2013
Beiträge: 34
Status: Offline
|
| Verfasst am: Do Okt 03, 2013 2:07 am Titel: |
|
|
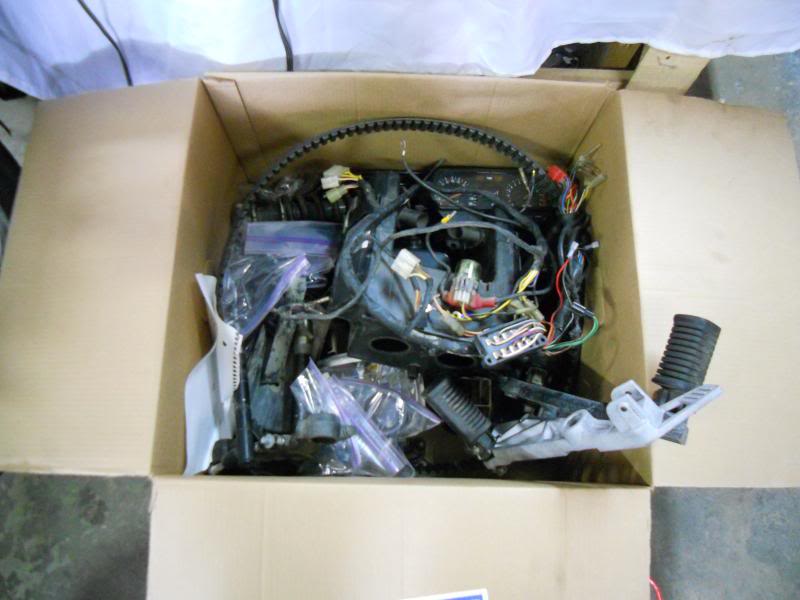
| My tachometer was slow moving. I took it apart and lubed the moving parts but broke off my needle by accident. Dang it! Just bought a complete cluster on ebay. Parts are so hard to find now days, I better be careful. |
|
| Nach oben |
|
|
Hafrod
Anmeldungsdatum: 28.09.2013
Beiträge: 34
Status: Offline
|
| Verfasst am: Sa Okt 05, 2013 2:35 pm Titel: |
|
|
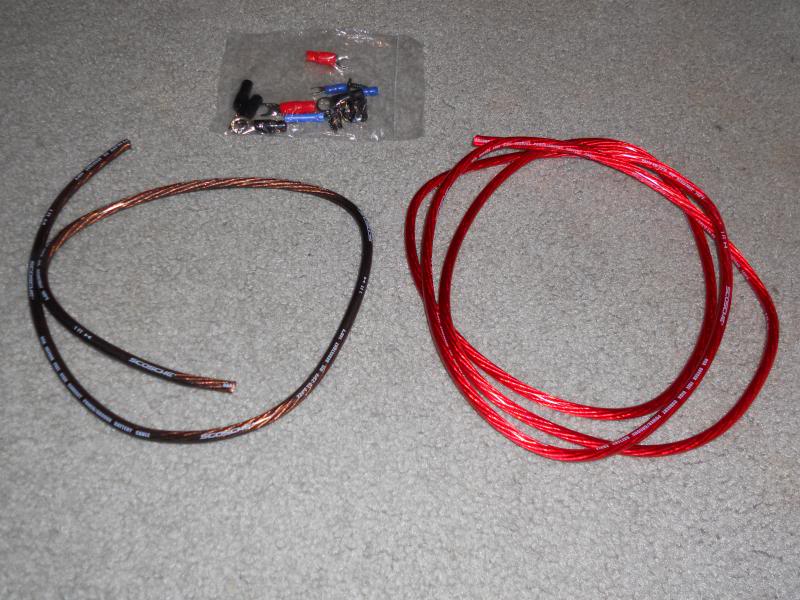
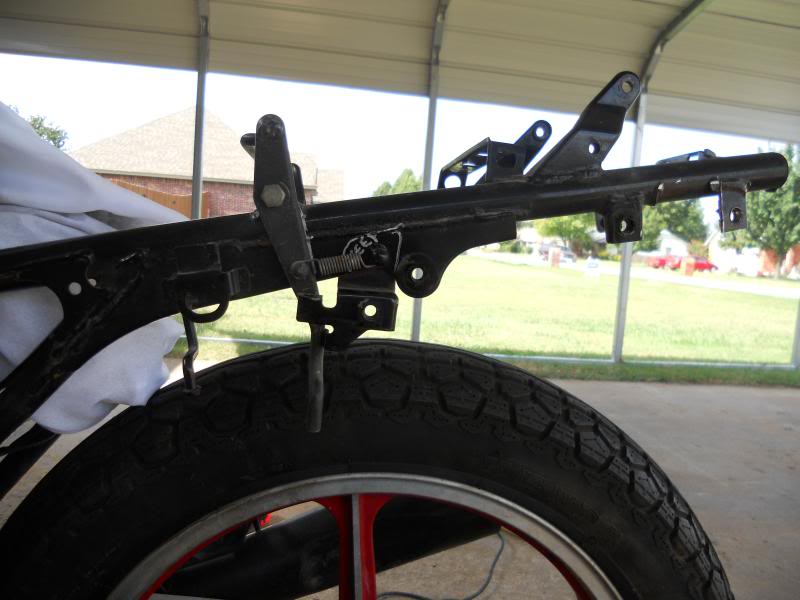
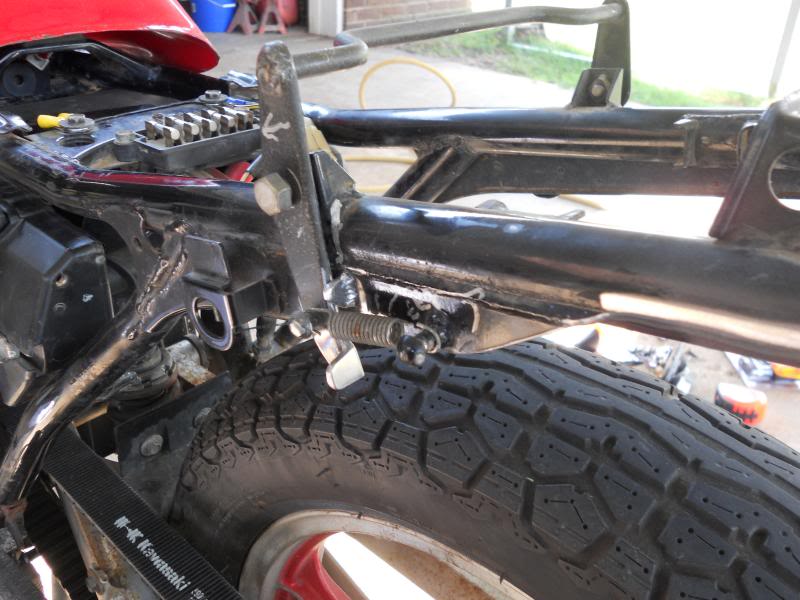
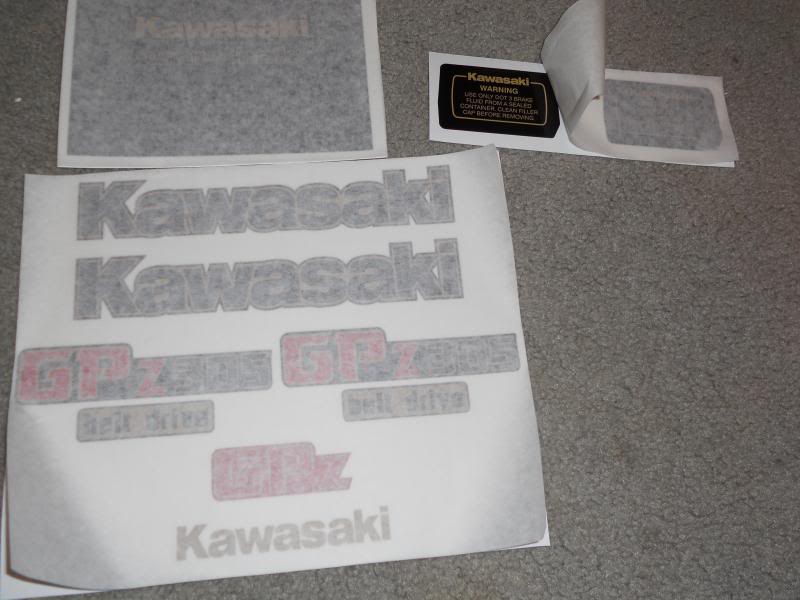
There are a few subtle changes I'm going to make to clean it up like removing unneeded stuff off the chassis. All the brackets for rear grab bar, helmet locks and bungy cord stubs went away today. I modified the lever for seat removal by shortening it, welding on a pad for my finger, and welding a stopper on the frame rail. I bought some small blinkers that look like the originals. The stock ones are bulky looking. My decals (stock) are supposed to be done friday. I had the original decals copied and made with a digital printer so they are not stacked seperates. I had a pint of base coat candy red, pint of starburst silver, and a pint of med blue effect mixed at my auto paint store. I'm going to paint on the stripes, put on all the decals, and clear all the body parts. I'll then sand and buff to mirror finish. Found a car stereo amplifier wiring kit at Walmart on the clearance rack. It's the same gauge as my GPZs starter wire. The wire shield is red but transparent so you can see the wires inside it. Thought it would be pretty cool to use it for a new starter wire. My rubber boot protecting the hot post on the starter is badly dry and cracked. I ordered a new one today from my local Kawasaki dealer. The kit also included a transparent black for ground. I'll use it on my engine to frame ground.
       |
|
| Nach oben |
|
|
Hafrod
Anmeldungsdatum: 28.09.2013
Beiträge: 34
Status: Offline
|
| Verfasst am: Mi Okt 09, 2013 2:36 am Titel: |
|
|
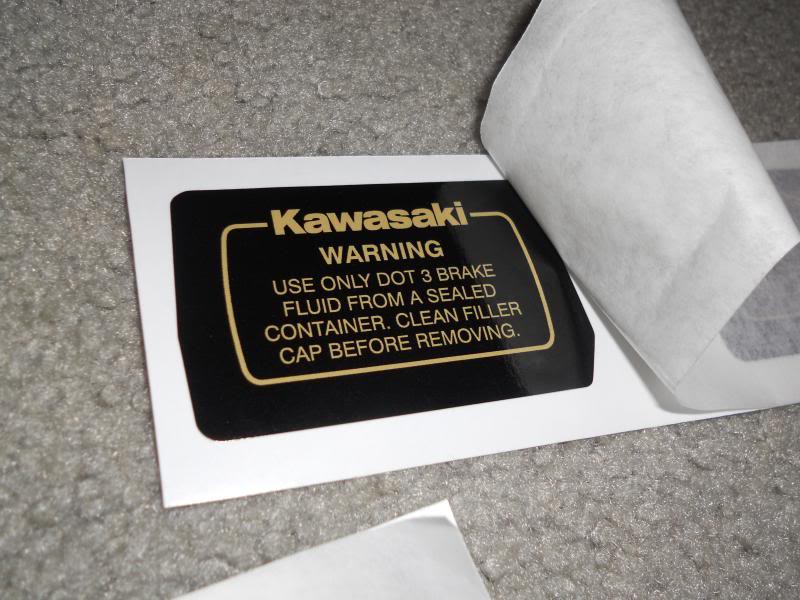
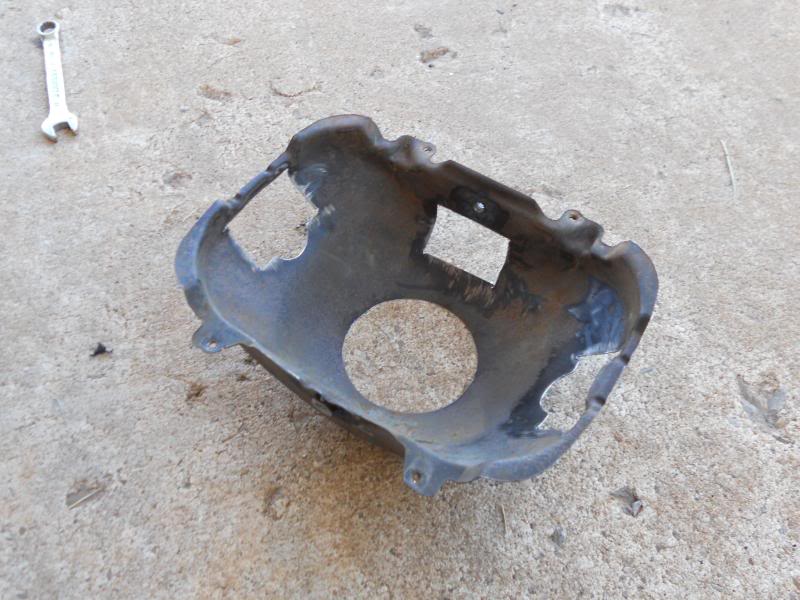
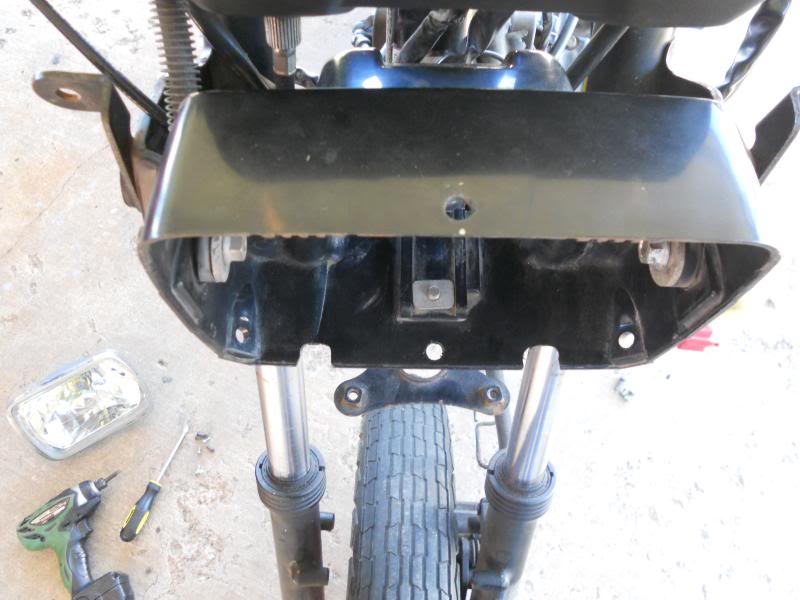
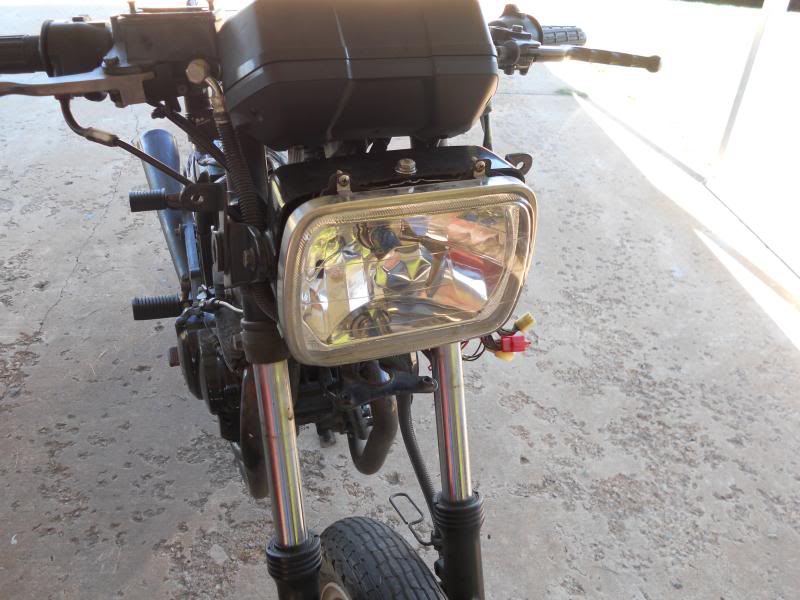
Picked up my decals today, he made me an extra for the master cylinder lid just in case of brake fluid spill or whatever. I also have a pair of headlights that I'll never use on a car so I decided to try to fab one onto the bike. I went to a salvage yard and got the ring and bucket from a Chevy S-10. I seen a 2001 ZRX1200R with this style light and thought it made it look more modern. I actually found the motorcycle headlamp like mine on ebay but the side adjustment screw is on the wrong side and its in Taiwan. So, I spent $5 on a bucket/ring and fabbing is free. I'll build an adjustable setup so it can be aimed wherever. I went back to Fastenall to get my #80 drill bits and they never got ordered. They had the stainless socket caps for my engine sidecover that were really long. I had 4 different lengths I was not being able to locate. They had to order them also but they did sell me just singles instead of having to buy bulk. I'm repainting the engine black but wanted to use stainless socket caps that I'll polish to give the engine a little detail.
   |
|
| Nach oben |
|
|
Hafrod
Anmeldungsdatum: 28.09.2013
Beiträge: 34
Status: Offline
|
| Verfasst am: Mi Okt 09, 2013 10:55 pm Titel: |
|
|
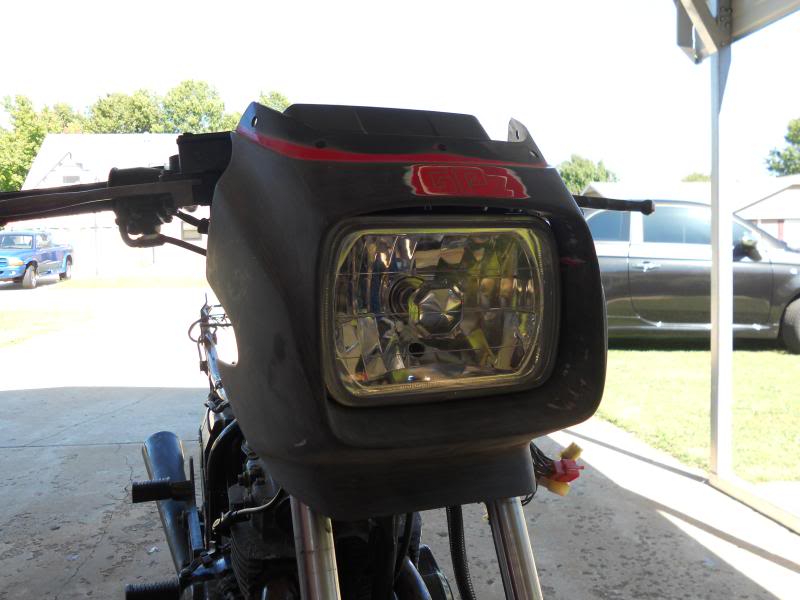
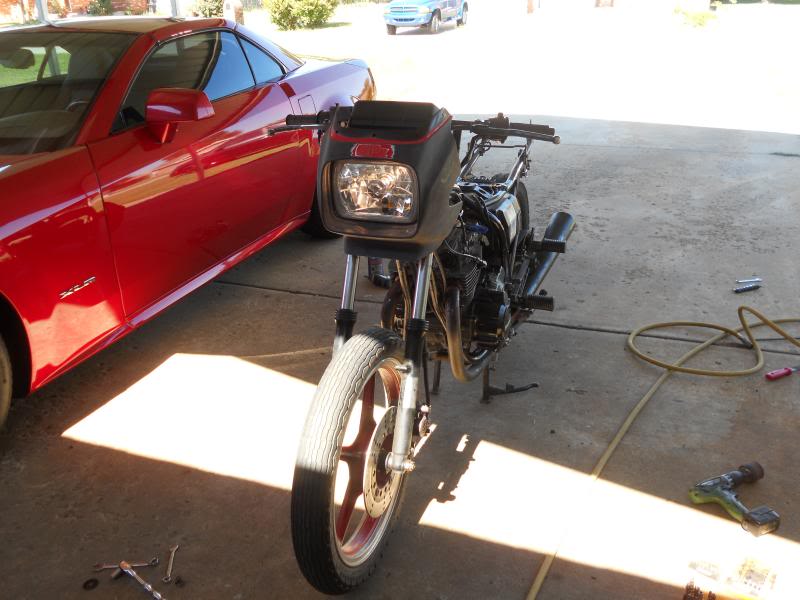
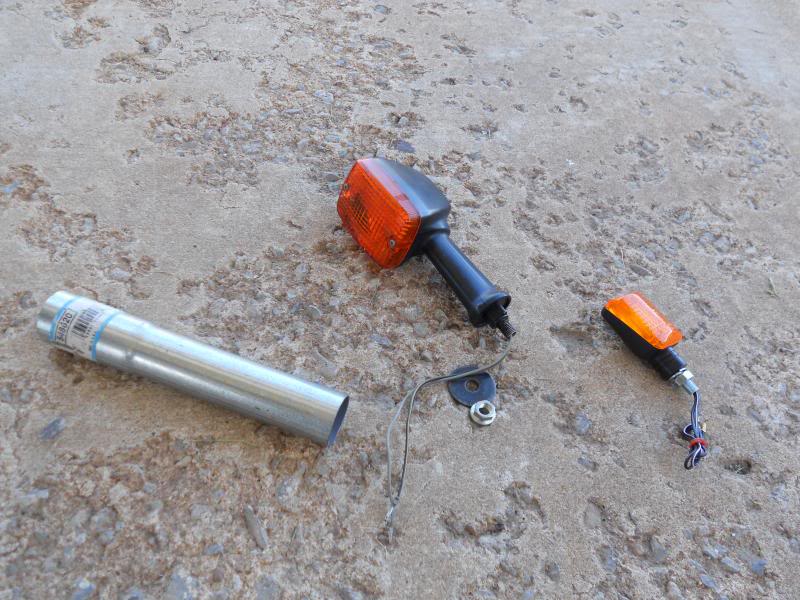
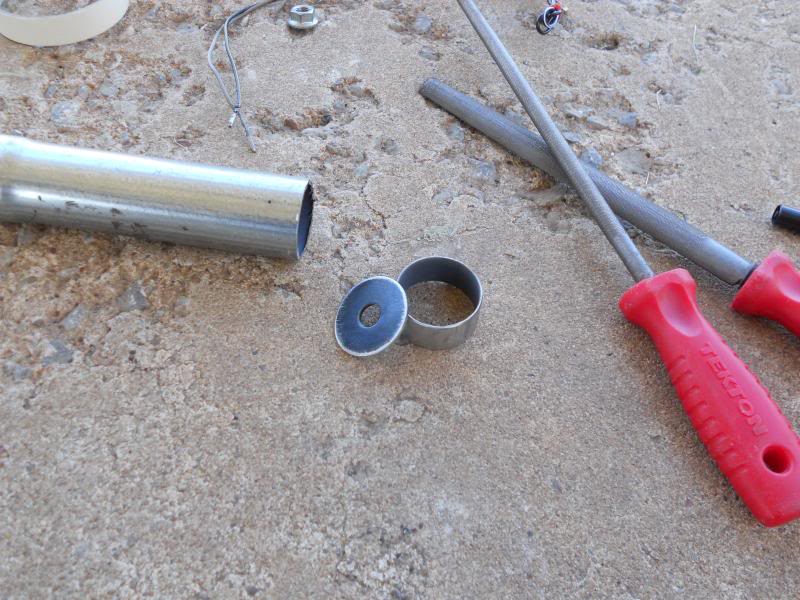
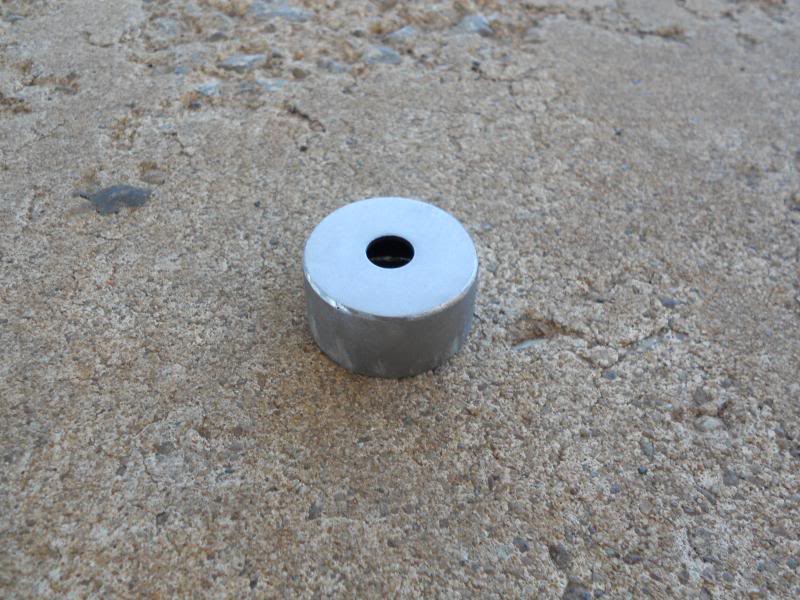
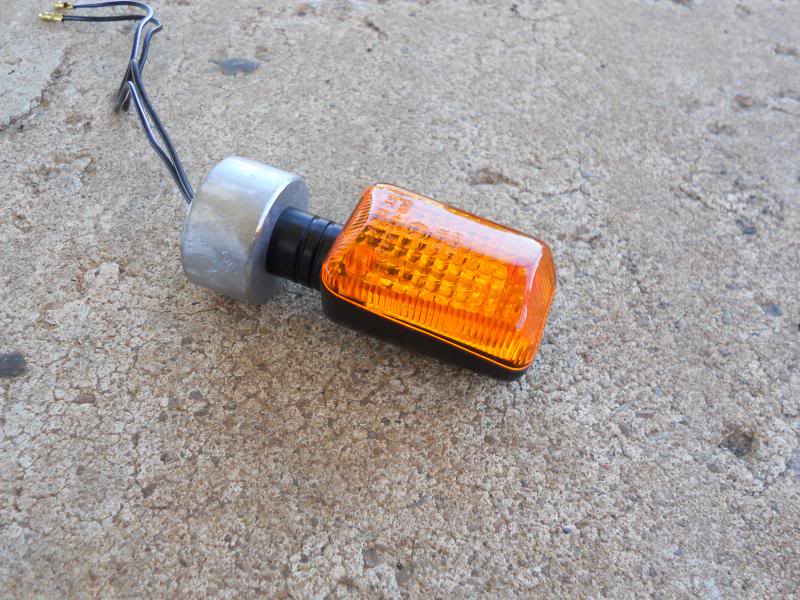
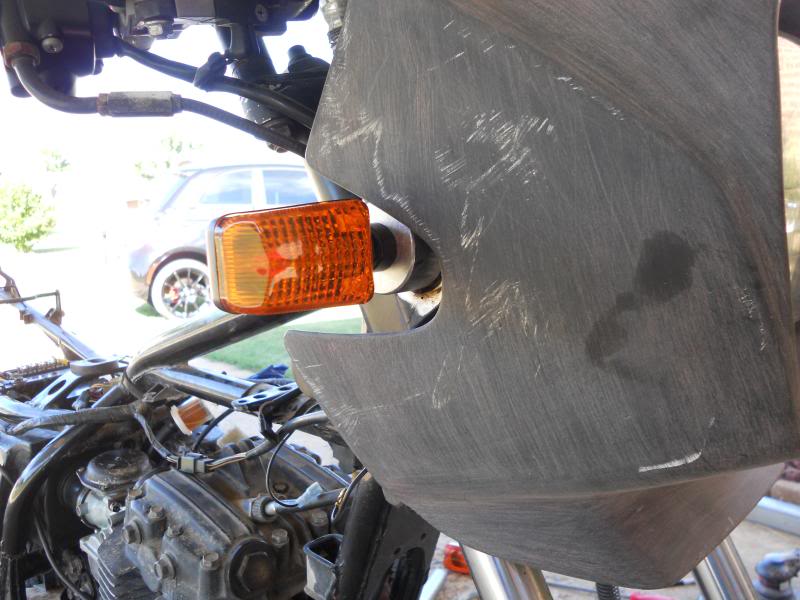
Got a good half day in on some fab work. I decided to mate the S-10 headlight bucket into the GPZs headlight bucket. This pulled the headlight out of the fairing about 3/8" which I like better. I altered the GPZ bucket very little and it could be put back stock if needed. The S-10 bucket took alot of cutting and trimming to get the fit. I have not designed a side to side adjustment yet. I'm going to ride it around the block tonight in the dark to see about where the beam is on the road. I shined it on my garage door and it appears straight. I may not use a side to side adjuster. The front smaller stock look blinkers were a bit of a problem when I went to mount them. I had to build 3/4 long spacers out of 1 1/2" muffler pipe. I used the original blinkers large washer on the ends. Welded them up and ground them smooth. It almost looks like a stock piece. I'll have to fully weld the spacers to the blinker mounts. I'll grind them smooth with a bevel and use body filler for a nice finished look after I remove them from the forks. This way they will appear as one piece.
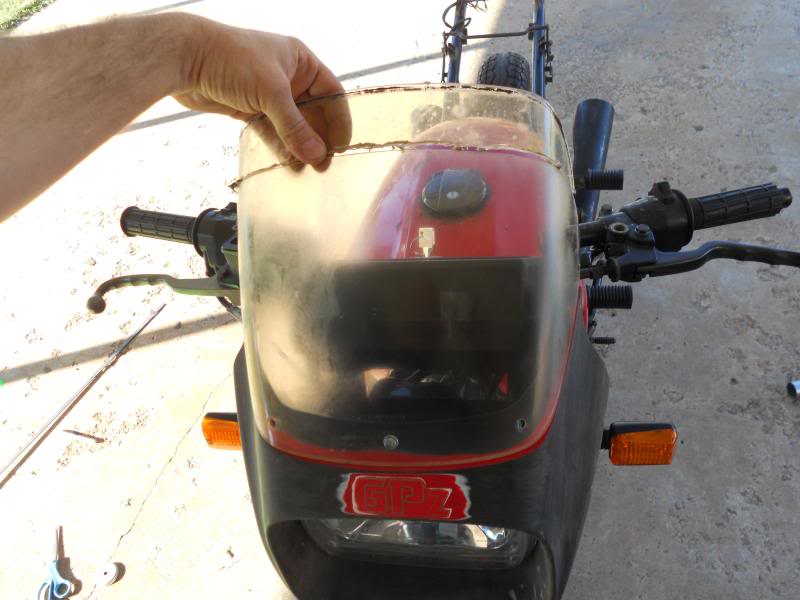
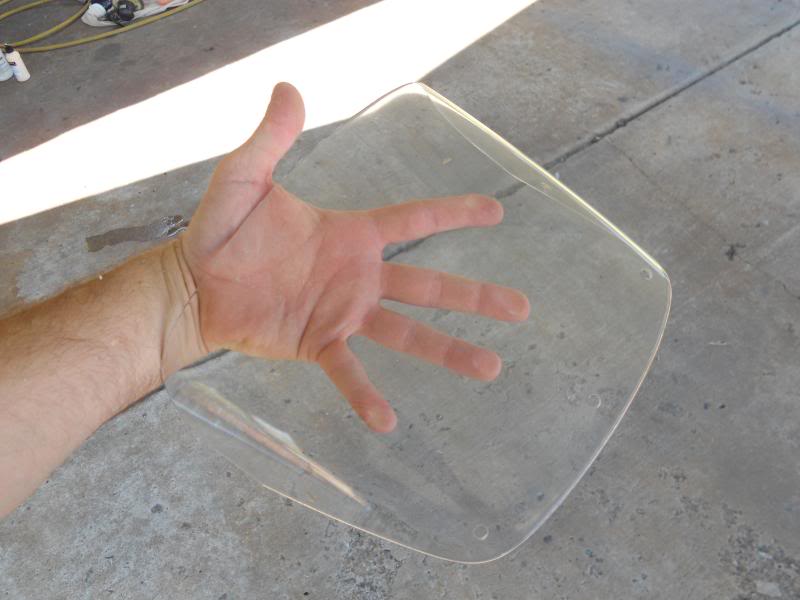
I had found a plastics company that would reform me a new windscreen for around $100. It was going to be moulded off the original which would make it a bit bigger. I thought I would build one out of sheetmetal formed from under the windscreen so it would fit properly. I started messing with my severly scratched and milky original. I decided it was too tall. I cut it down two inches and reshaped the curved corners. I like it waaaay better with a chopped windscreen. I grabbed my DA sander and the only fine grit DA paper I had was 1200. I sanded it pretty hard for about 5 minutes. Almost all the scratches came out. I buffed it just with compound to see if it would try to shine and it did. I thought it was cracked but it was a scratch. I'll go to the paint store tomorrow and load up on some 1000, 1200, 1500, 2000, and 2500 grit DA pads. I got more time than money so I'll try to salvage it.
        |
|
| Nach oben |
|
|
Hafrod
Anmeldungsdatum: 28.09.2013
Beiträge: 34
Status: Offline
|
| Verfasst am: Mi Okt 09, 2013 10:56 pm Titel: |
|
|
      |
|
| Nach oben |
|
|
Hafrod
Anmeldungsdatum: 28.09.2013
Beiträge: 34
Status: Offline
|
| Verfasst am: Do Okt 10, 2013 6:55 pm Titel: |
|
|
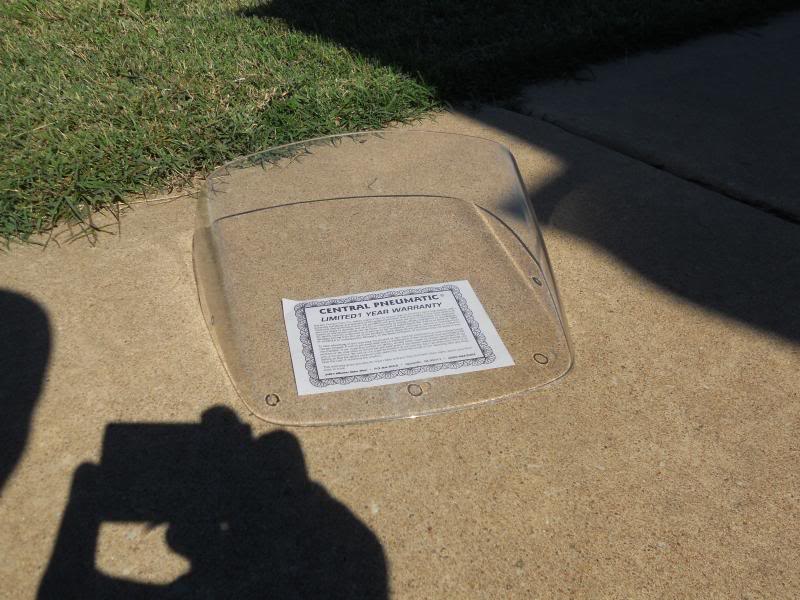
After sanding and polishing for about 2 hours, it turned out pretty nice. I will not be replacing something that turned out this good. I DA sanded it with 1000, 1200, 1500, 2000, 2500, 3000, and 4000. I spent about $30 in materials but already had the mini air buffer, buffing compound, and plastic polish.
  |
|
| Nach oben |
|
|
Hafrod
Anmeldungsdatum: 28.09.2013
Beiträge: 34
Status: Offline
|
| Verfasst am: Do Okt 10, 2013 7:37 pm Titel: |
|
|
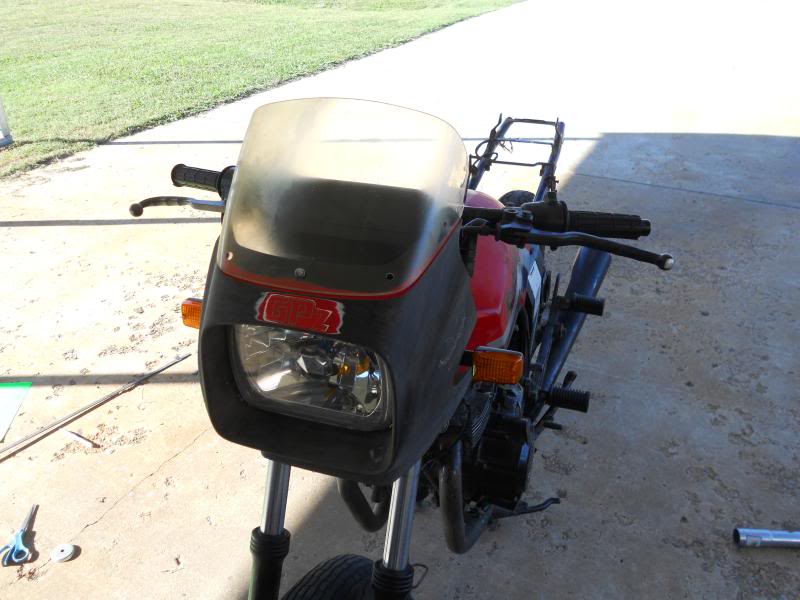
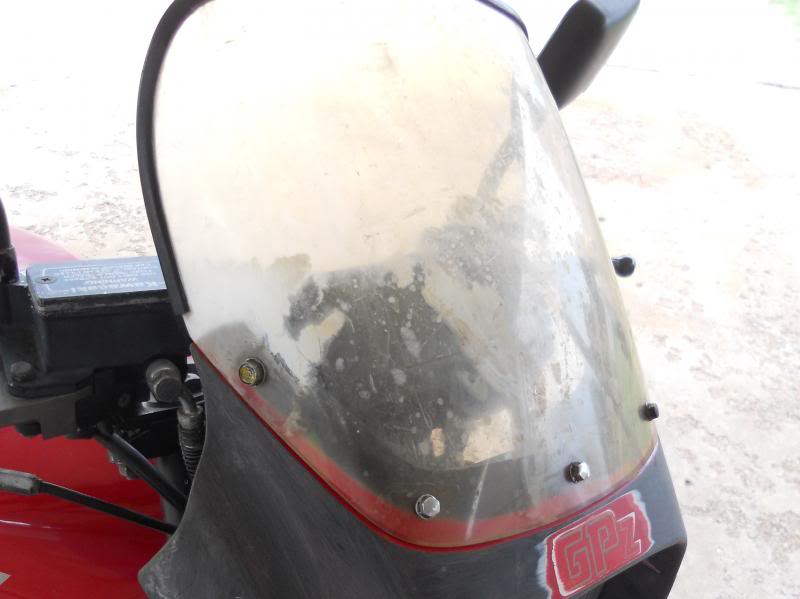
Here's before
 |
|
| Nach oben |
|
|
Hafrod
Anmeldungsdatum: 28.09.2013
Beiträge: 34
Status: Offline
|
| Verfasst am: Do Okt 10, 2013 8:42 pm Titel: |
|
|
 |
|
| Nach oben |
|
|
Hafrod
Anmeldungsdatum: 28.09.2013
Beiträge: 34
Status: Offline
|
| Verfasst am: Fr Okt 18, 2013 10:04 pm Titel: |
|
|
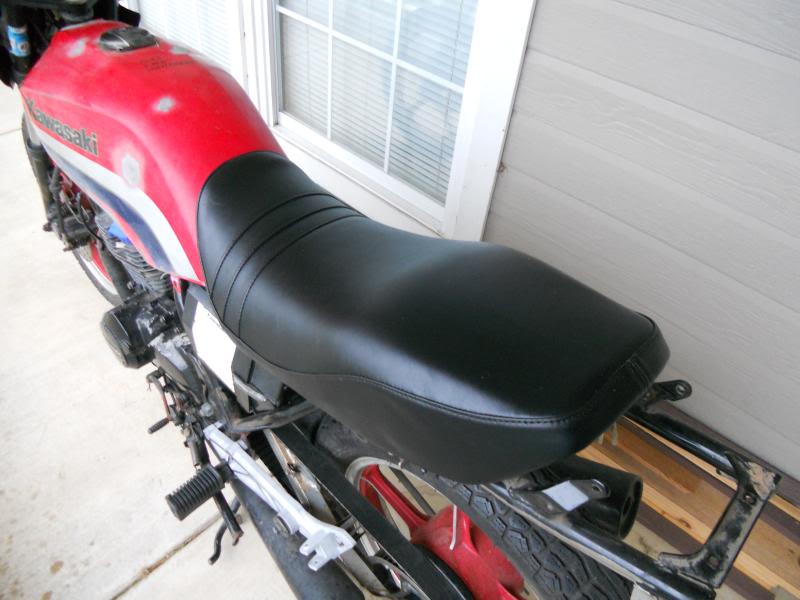
Got my seat recovered
 |
|
| Nach oben |
|
|
SRadi
Anmeldungsdatum: 30.03.2007
Beiträge: 134
Wohnort: Südliches Sauerland
Status: Offline
|
| Verfasst am: Sa Okt 19, 2013 2:54 pm Titel: |
|
|
Is the new seat cover?
the thread is very interesting - thank you for!
Please more information about the restoration!
Many greetings
SRadi |
|
| Nach oben |
|
|
Frank
Anmeldungsdatum: 14.03.2006
Beiträge: 21
Wohnort: Wuppertal
Status: Offline
|
| Verfasst am: Di Okt 29, 2013 5:53 pm Titel: |
|
|
Ah. Very nice. Someone who makes a lot of work and custom on the 305.
Very intresting is the front wheel with one brake-disc and not the option to fit a second one. |
|
| Nach oben |
|
|
Hafrod
Anmeldungsdatum: 28.09.2013
Beiträge: 34
Status: Offline
|
| Verfasst am: Di Nov 26, 2013 11:27 pm Titel: |
|
|
It is getting cold here so probably will not be working on the bike until spring. I just found another 1983 GPZ 305 for sale with new tires for $500. I offered $350 and he accepted. I am hoping he will deliver it because it does not run. It is 80 miles from me and I do not have a truck. I want it for a parts bike to keep me off ebay.  |
|
| Nach oben |
|
|
Lothi
Site Admin
Anmeldungsdatum: 29.06.2003
Beiträge: 609
Wohnort: Nürnberg
Status: Online
|
| Verfasst am: Mi Nov 27, 2013 6:35 pm Titel: |
|
|
Some years ago, when I was active on gpz305 i took one, very cheap, but some hundreds of km away and no truck
I unmounted the co-drivers seat in my old Polo and moved off to the vendor.
It took me 30 minutes to unmount tank, front- fender and -wheel, fairing, flashers and exhaust-pipes.
Least unmounting the battery and the whole bike took place flat on co-drivers side !
Just in a small VW Polo 
_________________
Grüsse
Lothi  |
|
| Nach oben |
|
|
Hafrod
Anmeldungsdatum: 28.09.2013
Beiträge: 34
Status: Offline
|
| Verfasst am: Do Nov 28, 2013 3:09 am Titel: |
|
|
| I may just go ahead and finish it before spring. It will probably only take about two weeks and that's one project finished. I have two other projects here - 1978 Olds 442 and a 1955 Chevrolet Belair |
|
| Nach oben |
|
|
Hafrod
Anmeldungsdatum: 28.09.2013
Beiträge: 34
Status: Offline
|
| Verfasst am: Sa Nov 30, 2013 11:18 pm Titel: |
|
|
| The parts bike will be here Monday morning. I'm excited. May try to get it running to see how good the engine is. Tires are brand new with no miles but a couple years old. I'm worried they'll be dry cracked. I'll post pics Monday. |
|
| Nach oben |
|
|
Hafrod
Anmeldungsdatum: 28.09.2013
Beiträge: 34
Status: Offline
|
| Verfasst am: Di Dez 03, 2013 7:38 pm Titel: |
|
|
| The parts bike never made it. The guy sent me an email saying they can't find the plastics. I offered $300 but waiting to hear back from him. |
|
| Nach oben |
|
|
Hafrod
Anmeldungsdatum: 28.09.2013
Beiträge: 34
Status: Offline
|
| Verfasst am: Do Dez 05, 2013 4:40 pm Titel: |
|
|
They delivered the parts bike this morning. Brand new and never ran tires. It is missing some parts but I have a spare engine if I need it. There are a few parts in better shape than mine that I will use.
 |
|
| Nach oben |
|
|
Hafrod
Anmeldungsdatum: 28.09.2013
Beiträge: 34
Status: Offline
|
| Verfasst am: Fr Dez 06, 2013 11:59 pm Titel: |
|
|
UPS is getting to be regular here. Got most of my smalls. Waiting on a clutch spring set and more engine gaskets. I wanted genuine Kawasaki gaskets so had to piece them from different places.
 |
|
| Nach oben |
|
|
Hafrod
Anmeldungsdatum: 28.09.2013
Beiträge: 34
Status: Offline
|
| Verfasst am: Mi Dez 11, 2013 8:36 pm Titel: |
|
|
Waiting on the snow to melt while being cooped up inside, I got to work on the plastic ignition switch surround. The sun had it dry rotted. The plastic was chalky and sluffed off easily leaving deep scratches and nicks. I scuffed it with a scotchbrite pad and sprayed it with SEM Landau Black vinyl/plastic paint. I sanded in between coats till some of the really deep scratches and nicks were flat. I then used an aerosol can of bed coating applied with 2 medium coats. After 15 minutes, I sprayed it again but holding the can far away and dusting it on. After that dried in about an hour, I used a wore out brown scotchbrite and scuffed it down to get the rough texture a bit milder. I then resprayed the Landau Black on it to give it the matte sheen like plastic again. It turned out awesome with the stock grained look.
 |
|
| Nach oben |
|
|
Hafrod
Anmeldungsdatum: 28.09.2013
Beiträge: 34
Status: Offline
|
| Verfasst am: Mi Apr 02, 2014 2:24 pm Titel: |
|
|
| Spring is finally here and it's time to get the 305 torn apart for new paint and parts. In three weeks there is a motorcycle club taking out their bikes under 450cc on a 120 mile ride. I plan on being there with mine. Just had breakfast and am heading to the garage. I should have it torn down by this evening. |
|
| Nach oben |
|
|
Hafrod
Anmeldungsdatum: 28.09.2013
Beiträge: 34
Status: Offline
|
| Verfasst am: So Apr 06, 2014 2:23 pm Titel: |
|
|
  |
|
| Nach oben |
|
|
|